There is a sort of meet and greet that takes place down at the creek every morning. The "locals" gather first, just before dawn. The females start quacking, as if they are calling out to the other ducks in the area. This quacking seems to act like a GPS guiding them to the creek. You can hear the ducks above, as they circle round and round, until they ascend onto the creek, in a controlled crash landing. These "visitor ducks" stay for a short time, and then go off to some unknown place, leaving behind "my ducks".
A farmer may wake to the crowing of a rooster, I wake to the morning chatter of my ducks.
Wednesday, March 14, 2012
Tuesday, March 13, 2012
WEEKEND PROJECT: BUILDING TWO 2X6 HIGH WALL RAISED BEDS
Material needed:
(1) 4x4x8 Pressure Treated Post @ $6.97
(6) 2x6x8PressureTreated Lumber @ $4.57 each
(1) Box of 2-1/2 in Deckmate screws @ $9.37
Optional Materials: chicken wire, weed
cloth
Power Drill
Staple gun to secure chicken wire
Total cost for 1 box-$43.76
1. Cut your 4x4x8 post into 4 equal sections of 2 feet.
2. Cut 2 feet off one end of each of the 2x6x8 lumber. This will give you 1 long side and 1 short side from each 8 foot section (for a total of 15" per side).
3. Working on a flat surface, secure the lumber to the post using the Deckmate screws. (There is no need to pre-drill with these screws.) Starting on the short side, line up the end of the board with the post. Do the same for the 2nd short side.
4. Once the short sides are completed, line up the long sides flush with the ends. Secure with scews. (I used 2 screws per each end of the boards).
5. Continue until all boards are attached. If you want the bed to be even higher, there is enough space for 1 more board on each side.
6. Level the area where the bed is going to be placed.
7. Optional: Attach chicken wire to the bottom of the bed with a staple gun to deter small pests. (You will have to turn the bed over or on its side.)
8. Before I set the bed in place, I like to lay down some weed cloth.
9. Move the bed into its final location.
10. You are ready to add dirt! You will need about .6 yards per box.
 |
| Completed 2x6 High Wall Raised Bed |
(1) 4x4x8 Pressure Treated Post @ $6.97
(6) 2x6x8PressureTreated Lumber @ $4.57 each
(1) Box of 2-1/2 in Deckmate screws @ $9.37
Optional Materials: chicken wire, weed
cloth
Power Drill
Staple gun to secure chicken wire
Total cost for 1 box-$43.76
1. Cut your 4x4x8 post into 4 equal sections of 2 feet.
2. Cut 2 feet off one end of each of the 2x6x8 lumber. This will give you 1 long side and 1 short side from each 8 foot section (for a total of 15" per side).
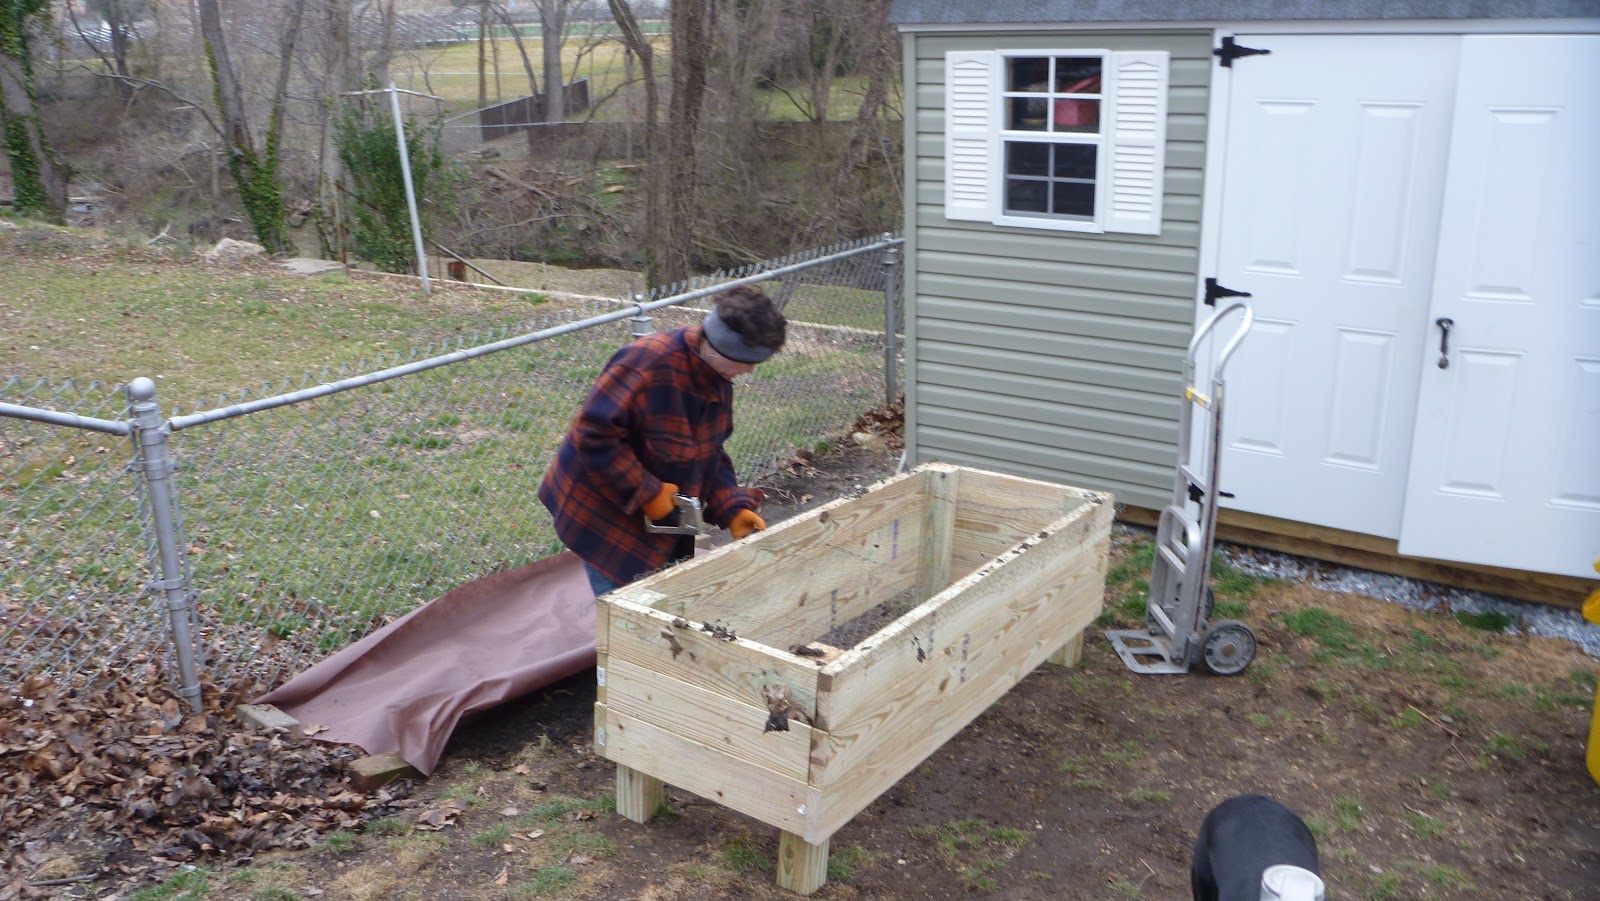
 |
| Assembling the bed. |
4. Once the short sides are completed, line up the long sides flush with the ends. Secure with scews. (I used 2 screws per each end of the boards).
5. Continue until all boards are attached. If you want the bed to be even higher, there is enough space for 1 more board on each side.
6. Level the area where the bed is going to be placed.
7. Optional: Attach chicken wire to the bottom of the bed with a staple gun to deter small pests. (You will have to turn the bed over or on its side.)
8. Before I set the bed in place, I like to lay down some weed cloth.
9. Move the bed into its final location.
10. You are ready to add dirt! You will need about .6 yards per box.
 |
| Weed cloth |
 |
| Adding chicken wire. |
 |
| A view from the top |
 |
| Filled |
Monday, March 5, 2012
The Next Chapter
It was a brutally hot day in July when we moved into our new house on the hill. We had hired movers for the larger items, and rented a u-haul for the rest of it. By the time we finished, it was late in the day. We were exhausted, starving, and in need of showers.
Three months earlier, if you had asked me if we were moving, I would have called you crazy. We had lived in our previous house for just about seven years. It was on a circle with the biggest back yard, which was appealing to me. My brother and sister in-law lived two doors down, which was great for our dogs. It was a nice house in a nice neighborhood. But the house was a twin and we where starting to out grow it. So one Sunday, on a whim, we went to a open house in a neighborhood called "the manor."
The inside of the house was nice, but I was eager to check out the yard. As we walked out the back door, I was disappointed by what I saw. There was only about 40 feet of yard in the back, enclosed by a chain link fence. Beyond the chain link fence was a overgrown hedgerow of sorts.Where would I put my garden? This won't do, I thought to myself. As we were getting ready to leave, the Realtor asked us what we thought? The house is nice, I said, but the yard is just to small. Oh hunny, she replied, the yard extends 150 feet past the fence, down to the creek. You just can not see it. I looked at my husband and said. I want this house. I want it too, he answered back.

Subscribe to:
Posts (Atom)