
Tuesday, December 10, 2013
A Concern for the Bumble Bee

Everyday, it seems that we hear something about the honeybee and colony collapse. However, wild "native bees", aka the bumble bee is a vital pollinator responsible for pollinating wild flowers and many crops (even in places where the European honey bee is present). It seems that like the honey bee, these wild bees seem to be in peril as well. In Vermont, of the 15 different species of bumble bees, 3 have gone extinct (with 1 or 2 more in decline). The culprit, most likely a harmful parasite imported from Europe and, you guessed it....PESTICIDES!
“Neonicotinoid pesticides are particularly dangerous to bees because plants absorb them through the roots, rendering all plant parts toxic to insects,” said Leif Richardson, an entomologist at Dartmouth College and co-author of the upcoming Guide to Bumble Bees of North America. ”This includes pollen and nectar, essential components of the bee diet.”
So what are the consequences? Most obviously, the loss to agriculture. About 1/3 of the food we eat is pollinated by bees. The feeding of livestock with alfalfa, legumes, and clover. There is the loss of wild plants, which effects the wildlife dependent on them for food. Many plants could become endangered due to the decline of their native pollinators. And let's not forget the economic cost.
Encourage native bees to your backyard by providing an inviting habitat. Leave hedgerows and do not clear cut hardwood tress for pine plantings. Provide ongoing food source of native, pollen and nectar producing plants. Opt not to use pesticides. Understand the importance of bees in pollination. If you do have a bee problem, search for someone who will remove/relocate if possible vs destroying

http://pastatebeekeepers.org/
http://pubs.cas.psu.edu/FreePubs/pdfs/uf023.pdf
Tuesday, December 3, 2013
Putting Garlic to Bed!
I shoot to plant garlic between Halloween and Thanksgiving, 6-8 weeks before the first hard frost to 2-3 weeks after, but about a month before the ground freezes solid. The goal is to get the garlic in the ground long enough to grow roots (about 1 month), but not so early that warm weather causes the tops to grow. (Raised beds are typically 8 to 13 degrees warmer then the ground). At 4" deep you wont the soil temperature at about 50F. To reach full maturity, garlic needs to be in the ground for about 9 months. That puts harvest time around the end of June into July.
I have three raised beds (4x4) at the bottom of the hill near the creek. They happen to be spaced 4 feet apart. (I am not sure why I put them in that way!) It dawned on me to construct 2 more raised beds, in between the existing beds, which was very easy to do! I dug up the ground and amended it with compost, manure, shredded leaves and kitchen scraps.
Take your seed garlic and divide it into cloves. Plant the individual cloves about 2' deep and 6-8 inches apart. Remember, the bigger the clove, the bigger the garlic bulb next year. Cover with a blanket of mulch (leaves, grass clippings, newspaper etc), about 6" deep for the winter. Come spring, if all goes well, shoots will start to pop up through the mulch!


Tuesday, November 26, 2013
Winter Birds

To say it was cold the past few days is a understatement. The bird bath in our backyard was more like a skating rink then a watering hole. Even the creek was starting to ice over in places. This got me to wondering how birds survive the winter and what we human can do to help?


Have you ever wondered how birds stay warm? My parrot Louie fluffs up his down feathers to trap in body heat. Others grow more feathers to insulate them from the cold. Some birds slow down the metabolic rate, while others huddle together at night for warmth. By keeping your birdhouses up during the winter, you may be providing shelter for some birds. At the end of summer, I go around and clean out any birdhouses that I can reach. That way the birds can use them during the winter and scope them out for the next spring nesting season as well.
Birds can eat snow in the winter, but it requires more energy to keep warm. If water is scarce, birds will have to travel in search of a water source. Lack of water not only causes dehydration, but with out it, birds are unable to preen their feathers. Preening helps to keep feathers in place, reducing gaps and loss of body temperature. In the winter, we use a heated dog bowl to provide water.

I love watching the birds in the winter. I found our feeders are much more active, giving us lots of viewing pleasure.
I heard a bird sing
In the dark of December
In the dark of December
A magical thing
And sweet to remember.
‘We are nearer to Spring
Than we were in September,’
I heard a bird sing
In the dark of December.
—Oliver Herford
Tuesday, November 12, 2013
"The color of springtime is in the flowers, the color of winter is in the imagination." ~Ward Elliot Hour


"Nature has undoubtedly mastered the art of winter gardening and even the most experienced gardener can learn from the unrestrained beauty around them."
~Vincent A. Simeone
The Gardeners Battle Cry..."More Garden, Less Grass"
Turning a grassy area in the fall into a new garden bed for the spring, without breaking your back!
 |
| The backyard gets lots of light both in the morning and the afternoon. |
 |
| Hostas burning up in the sun, on either side of the shed. |
 |
| First, I moved the Hostas from the backyard, to the more shaded front yard. |
 |
| Cut the grass down as low as possible or... |
 |
| I opted to remove the grass with a Hula or stirrup hoe. |
 |
| I divided and transplant some sun loving daisies to the area. |
 |
| Next, add about 2" of top soil mixed with manure to the area, |
 |
| and spread out evenly. |
 |
| Repeat on the left side. |
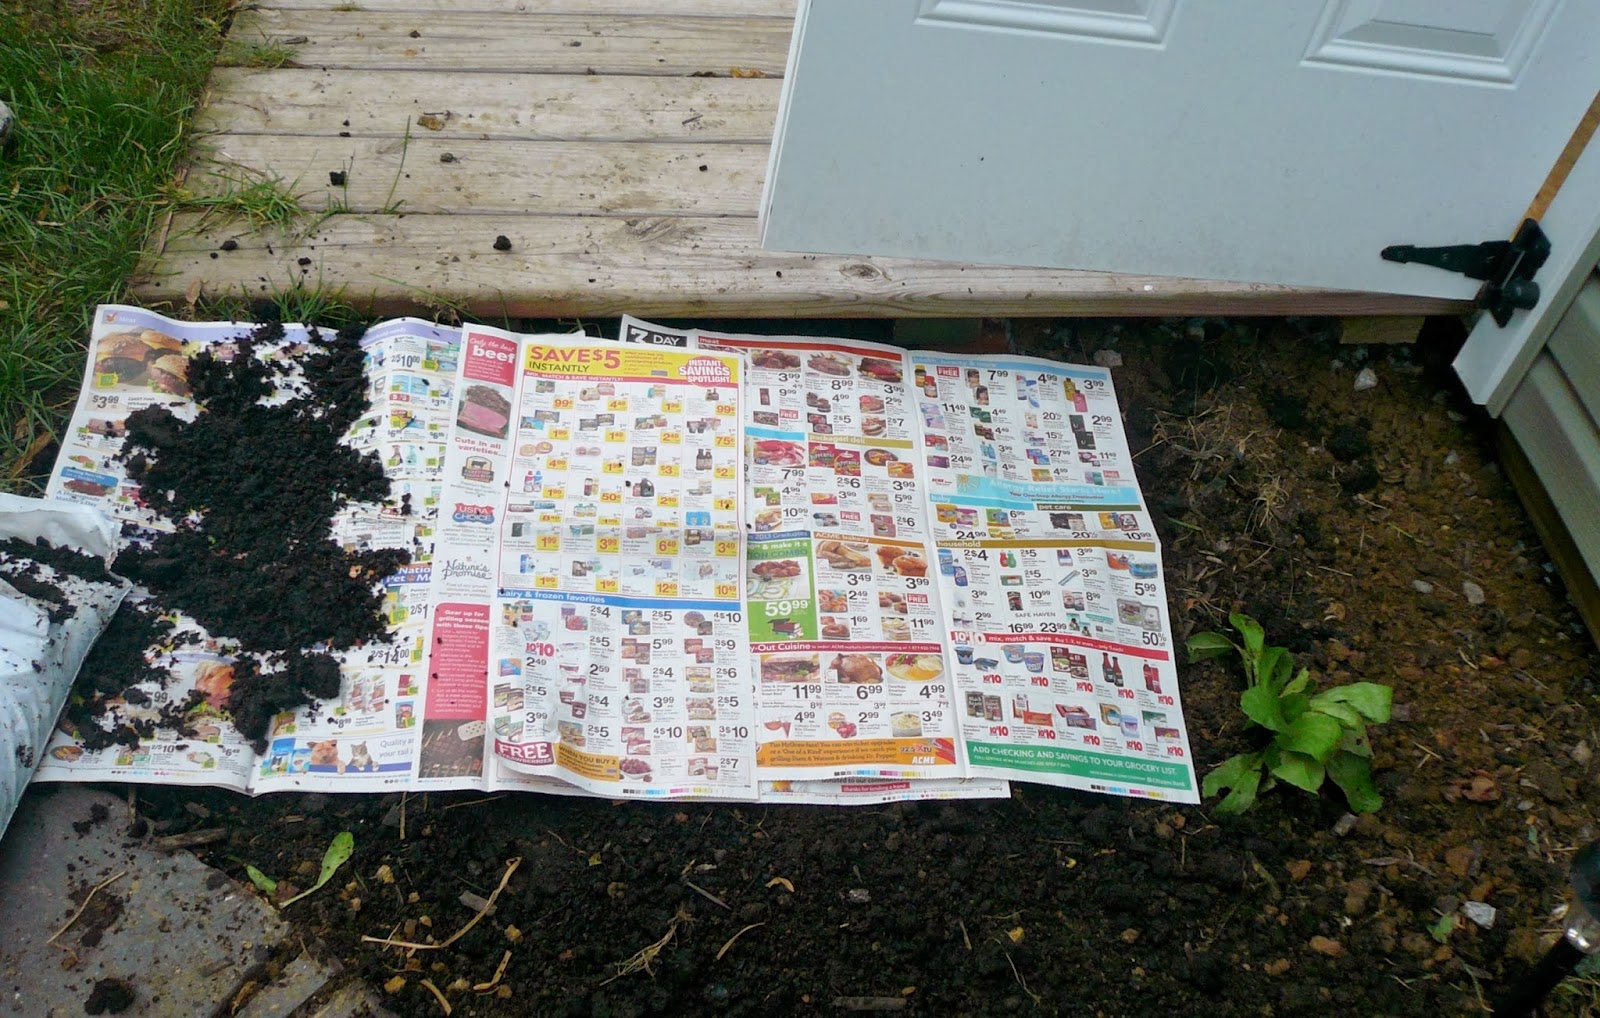 |
| Cover with several layers of newspaper to block out light and suppress grass and weeds. |
 |
| Cover the newspaper with additional top soil/manure. Add compost and organic materials you have on hand (chopped leaves, kitchen scraps, grass clippings etc.). Water well. |
 |
| I opted to cover the areas with landscape fabric (because of the dogs), but straw, compost, wood chips, or even cardboard will work. |
Come spring, I plan to turn this area into a herb garden!
Tuesday, November 5, 2013
Subscribe to:
Posts (Atom)